DIY Mid Century Modern Inspired Entryway Shoe Rack
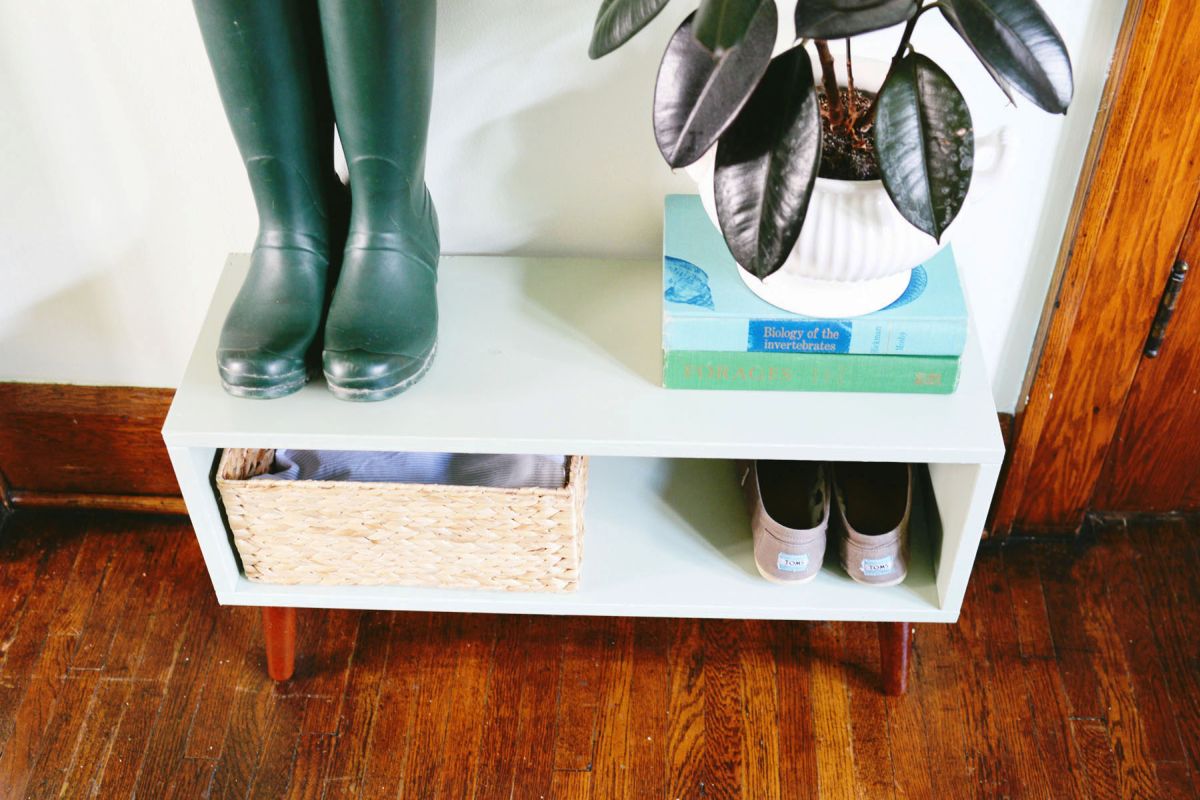
Is your entryway a complete disaster? Filled with coats, mismatched shoes and scarves? Create a stylish entryway shoe rack to cleverly organize and display your outing essentials. The perfect catchall place for seasonal footwear, purses, umbrellas, etc. Customize this piece for your space by easily adjusting the dimensions of the rectangular unit to make the perfect accent to your entry!


Supplies you’ll need for entryway shoe rack:
- 4 pieces of wood- two measuring 10″ x 24″ and 8″ x 6″, 3/4″ thick
- Sanding block and paper
- Hammer
- Nails
- Wood glue
- 4 angled face plates with screws
- 4 six inch tapered legs
- Paint
- Paint brush
- Screw driver
- Rag towel
Instructions to make a shoe rack for entryway:

Step 1: Choose the scrap wood
Have your wood pieces cut to the specified dimensions at your local hardware store. Sand the edges to prep them for assembly of the open shelf.
Step 2: Line them up
Line up your wood pieces in a rectangle shape. Place the smaller boards inside the longer boards so that the top and bottom are anchoring the sides. Apply wood glue to the edges and wipe off any excess with a wet rag.
Step 3: Hammering process
Attach the wood pieces together by hammering a nail into each corner piece where your wood attaches. If you have a brad nailer, this is the easiest way to make sure your shelf is attached securely. If not, then carefully hammer nails into each corner to secure the shelf. Let the shelf dry for a few hours or for the length of time as indicated on the back of the bottle of the wood glue.
Step 4: Coat of paint
Apply a coat of paint (or a finish if you decide to leave your shelf au natural) to the wood. Paint a thin and even coat and allow it to thoroughly dry overnight. Add a second coat if needed. Here we chose a light and fresh neutral green that paired nicely with the walnut stained tapered legs.
Step 5: Angle plates
Once your shelf is completely dry, add the angle plates to each corner. Make sure the flatter part of the angle is facing outward so that your legs are angled out. Screw into place with a screw driver and the screws that come in the pack with the plate.
Step 6: Add legs
Lastly, screw your tapered furniture legs into the angle plates to complete the feet on the shelf. Here we left ours the original wood finish but you can optionally add a coat of paint in a coordinating color with your shelf (or in a fun bold color if you leave your shelf wood colored).
Style your shelf with a catchall basket and you have the perfect spot for accessories in your entryway!


The post DIY Mid Century Modern Inspired Entryway Shoe Rack appeared first on Home Decorating Trends – Homedit.
